
Cloud Emulator
Create, run, and manage virtual Roku players and TVs from the Cloud Emulator web UI
The Roku Cloud Emulator is currently being deployed to developer accounts as part of a phased rollout. If you are interested in getting early access to it, express your interest here.
The Roku Cloud Emulator (RCE) enables you to create virtual Roku streaming players and TVs to develop and test your apps. You can use the RCE to automate CI/CD merges and nightly testing, and to iteratively validate features that do not require hardware-specific performance.
Virtual devices run the latest Roku OS version in a secure, controlled environment accessible through a web UI or REST APIs. The web UI features a virtual Roku remote control for launching and navigating your app, controlling playback, and accessing the options menu. Both the web UI and the APIs support sideloading apps and accessing the debug console.
For more information on programmatically accessing the RCE, see the Roku Cloud Emulator API Guide. You can use the interactive Swagger doc to test RCE endpoint calls directly.
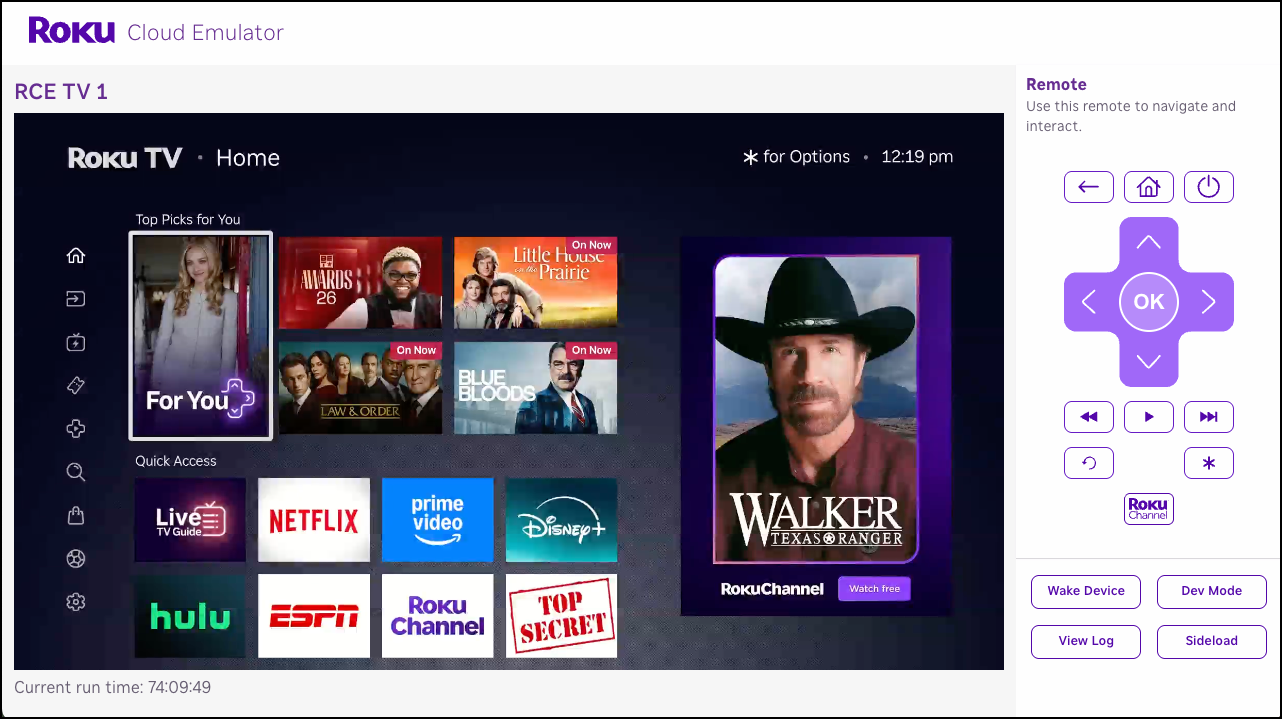
Virtual devices are not intended for real-world platform, speed, and performance testing. Use a physical Roku device for performance validation, memory usage testing, or hardware-specific functionality.
Prerequisites
To use the RCE, verify you have the following:
- Access to a Roku developer account. You must be the root account owner or have the Admin, Cloud Emulator user, or Cloud Manager role. See Appendix A for how to grant users RCE access.
- An RCE AWS Marketplace subscription. The RCE includes a 5-hour free trial for individual Roku developer accounts to create and launch a single device. To continue accessing your RCE device and create additional instances, the root account owner or a user with the Admin or Cloud Manager role can purchase an RCE subscription from the AWS Marketplace. See Appendix B.
- A Roku streaming app that is accessible from US-based devices.
- The Chrome web browser.
- If your service performs any validation or filtering based on Roku device model numbers, grant unrestricted access to all devices with model numbers matching the pattern
29[0-9][0-9]X. - If your streaming service blocks requests from cloud-hosted IP addresses, you may need to allowlist the IP addresses used by RCE instances. RCE instances access your streaming service from the following IP addresses: 44.239.29.169, 34.209.122.192, 54.202.182.128, 100.21.142.143, 34.210.16.174, 34.215.23.153, 35.160.218.63, 35.81.125.176, and 54.188.9.148.
Getting started
To get started with the RCE, follow these steps:
-
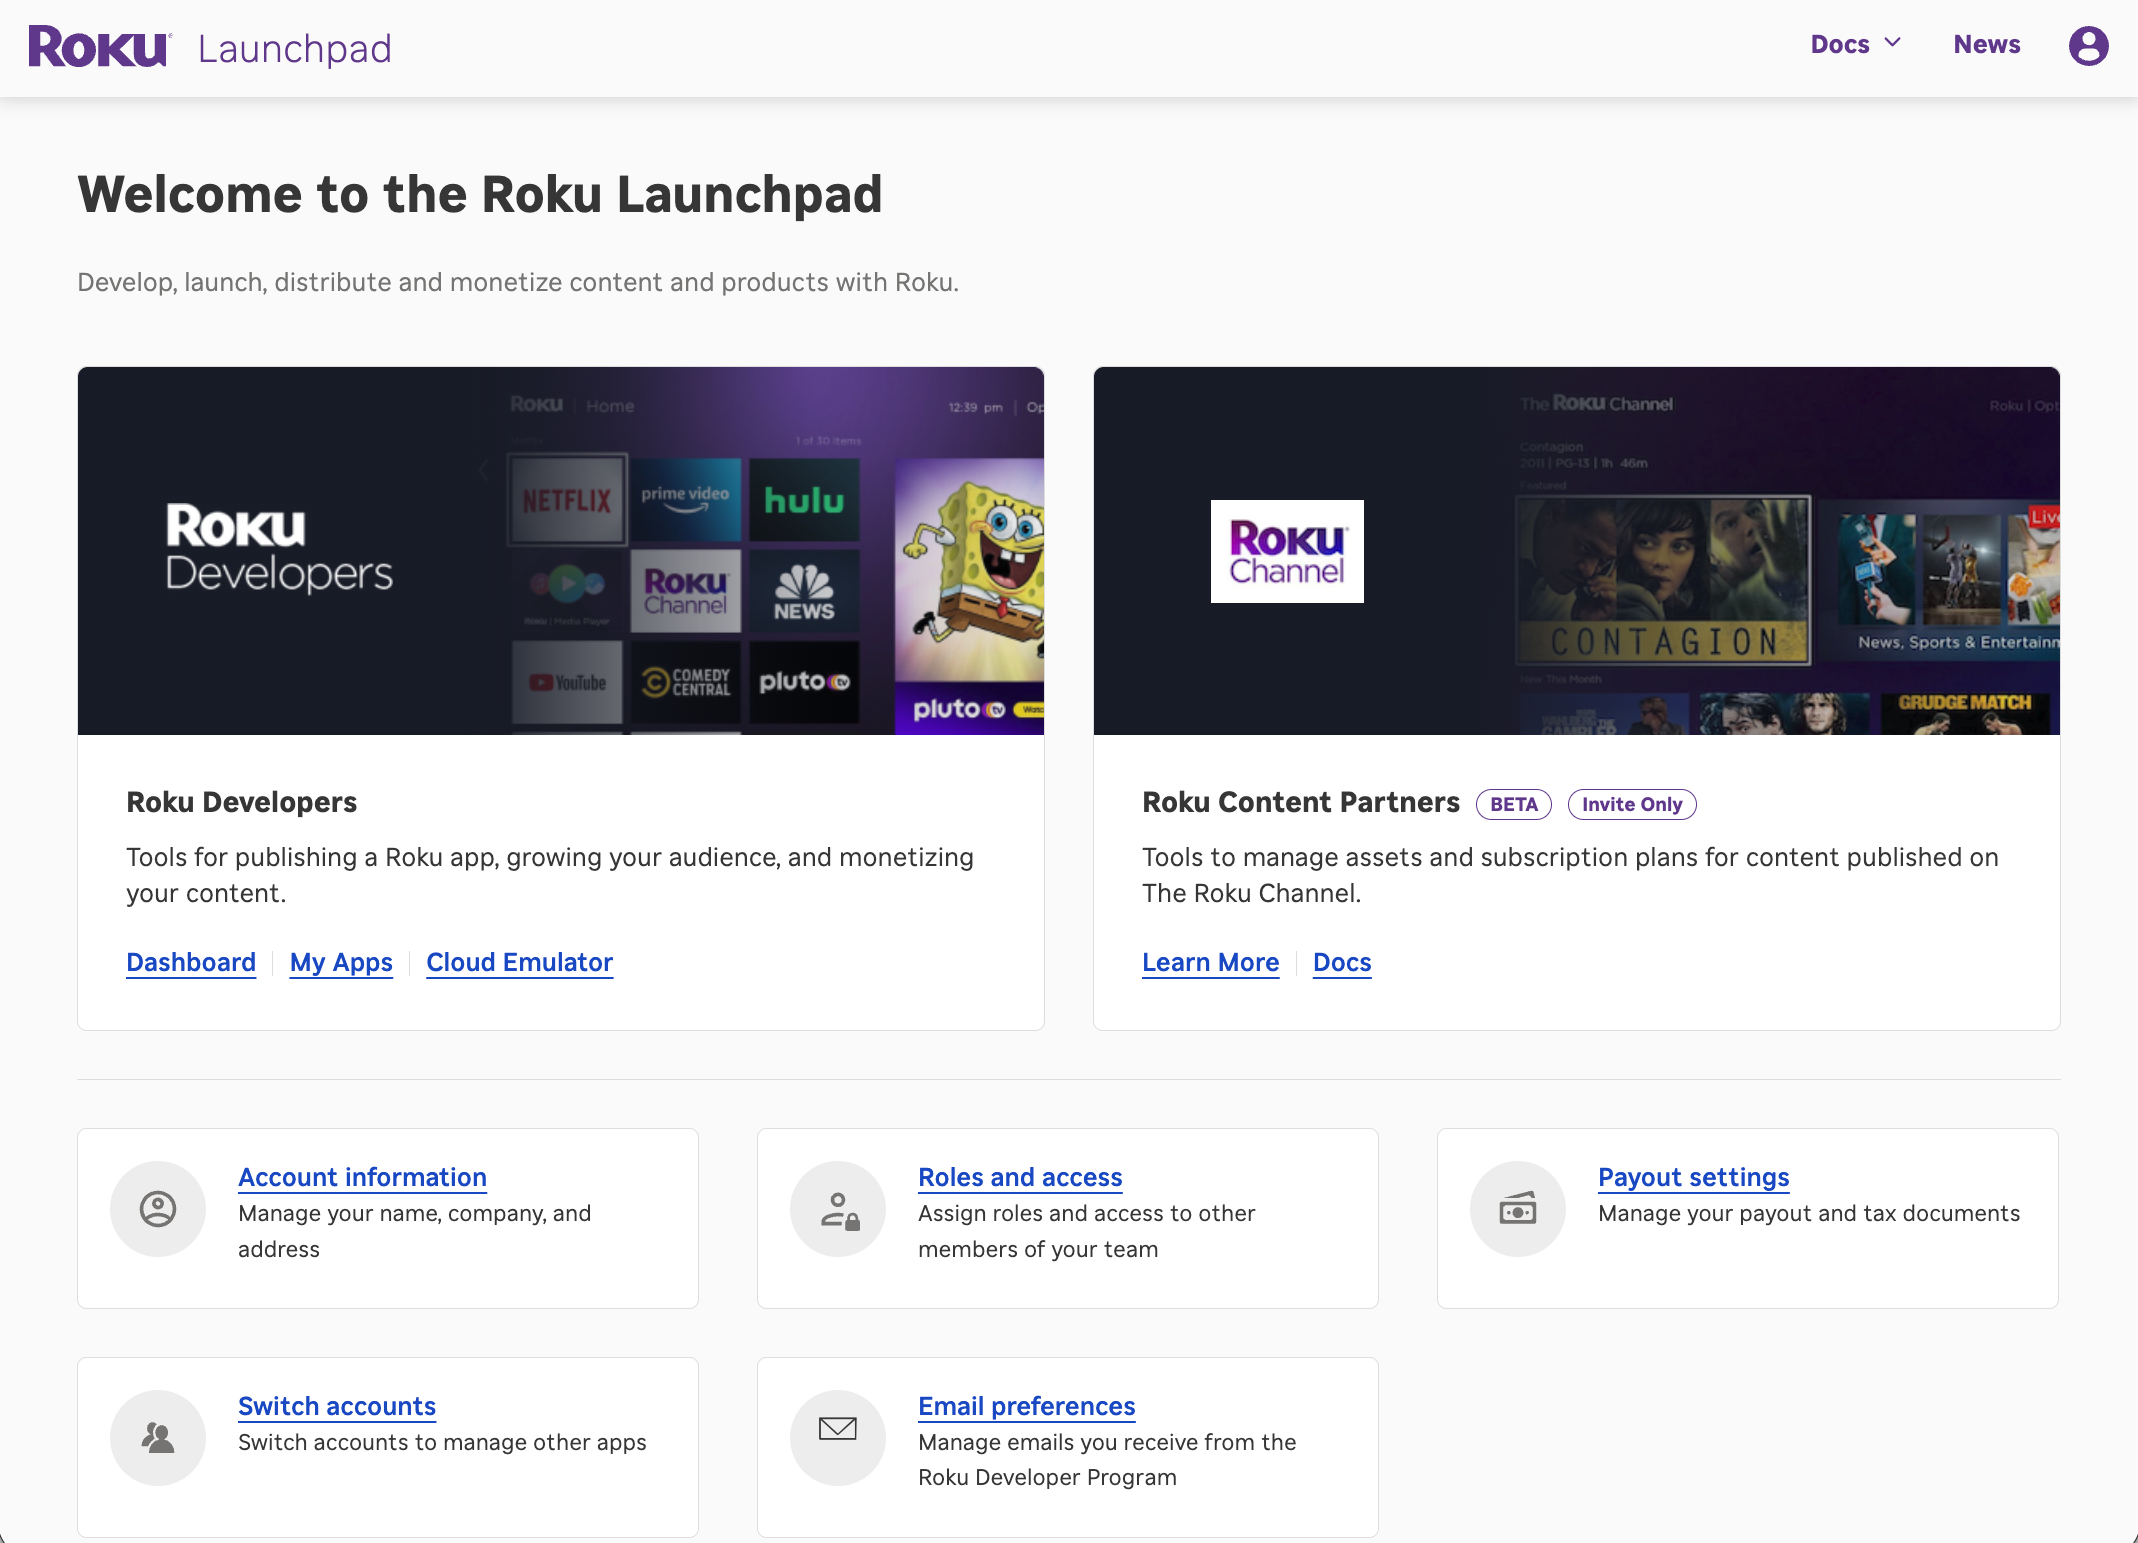
From the Roku Launchpad, click Cloud Emulator in the Roku Developers pane.
-
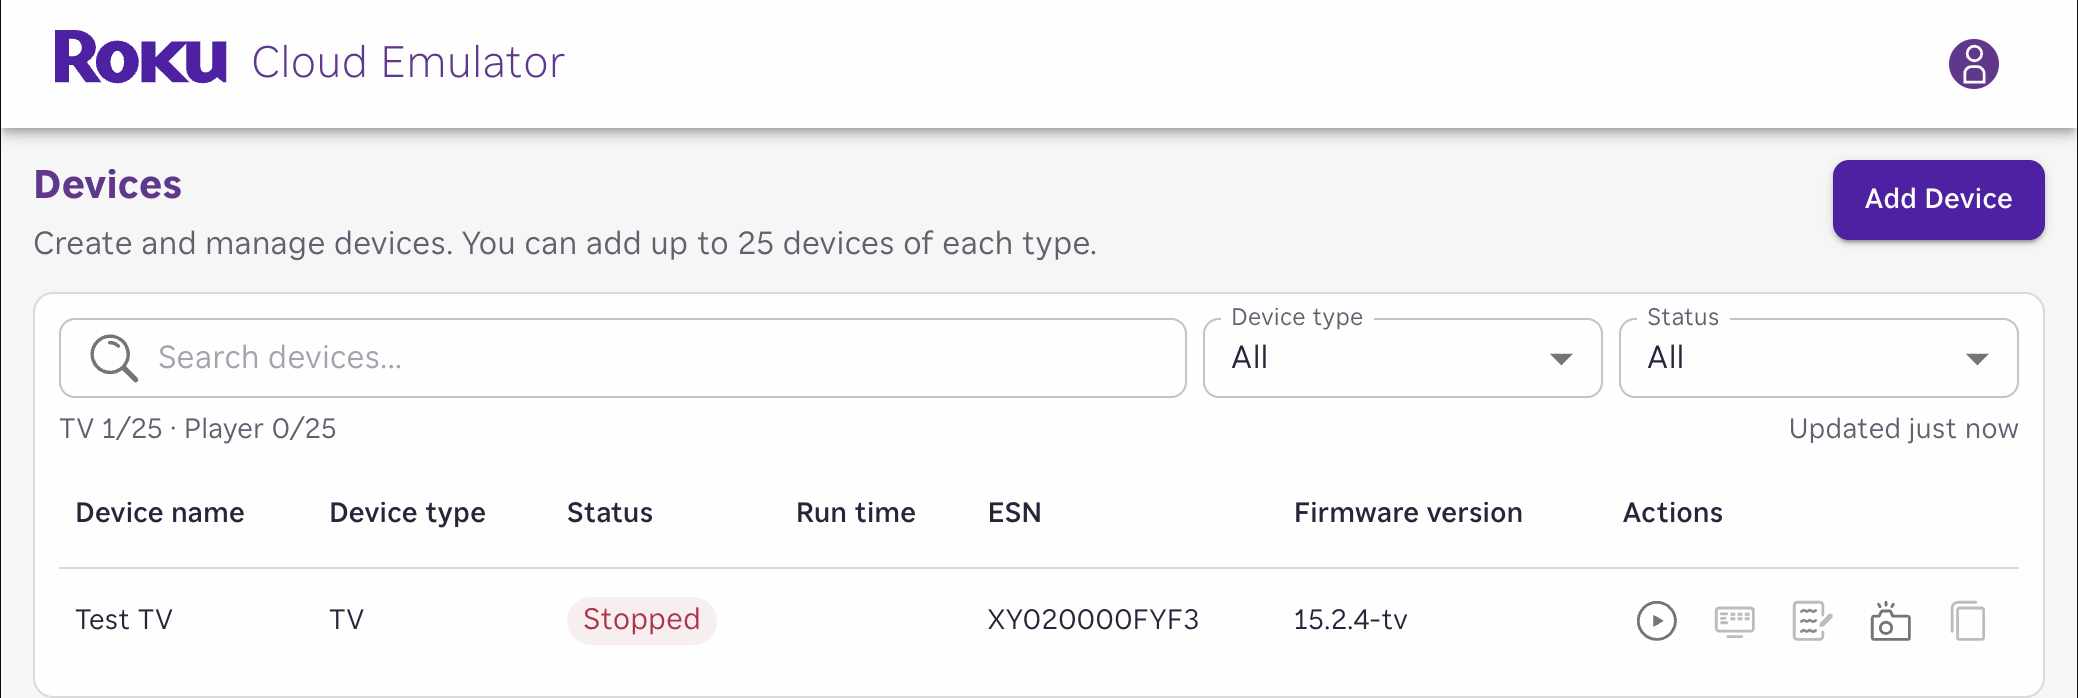
The Roku Cloud Emulator UI opens with the index page.
-
Use the page to add and manage your virtual Roku devices. You can filter the listed devices by name, state, and type.
-
For each device, the following information is listed:
| Field | Description |
|---|---|
| Device name | The user-specified name of the virtual device. |
| Device type | Indicates whether the device is a player (a Roku Streaming Stick or streaming player, for example) or a TV. |
| Status | The status of the virtual device: running, stopped, or pending. |
| Runtime | The amount of time the virtual device has been running. |
| ESN | The serial number of the Roku device. |
| Firmware | The Roku OS version running on the device. |
| Actions | The commands you can run on the device: Start/Stop device (close the virtual device UI), View device (launch the virtual device viewer UI), View logs (launch the BrightScript debug console), Snapshot (save the state of a virtual device at a specific time so you can restore it later; see Saving snapshots), and Copy Instance API URL (copy the address of the virtual device to your clipboard for later API requests). |
Adding devices
To add a virtual device, follow these steps:
- Click Add Device to open the Add device dialog.
- Enter a name for the device.
- Select the device type. You cannot change the device type after the device has been added.
- TV: a television with Roku OS built in.
- Player: a standalone Roku OS device connected to a TV over HDMI.
- Click Add. The device is added to the Devices list.
Running devices
To launch and run a virtual device, follow these steps:
-
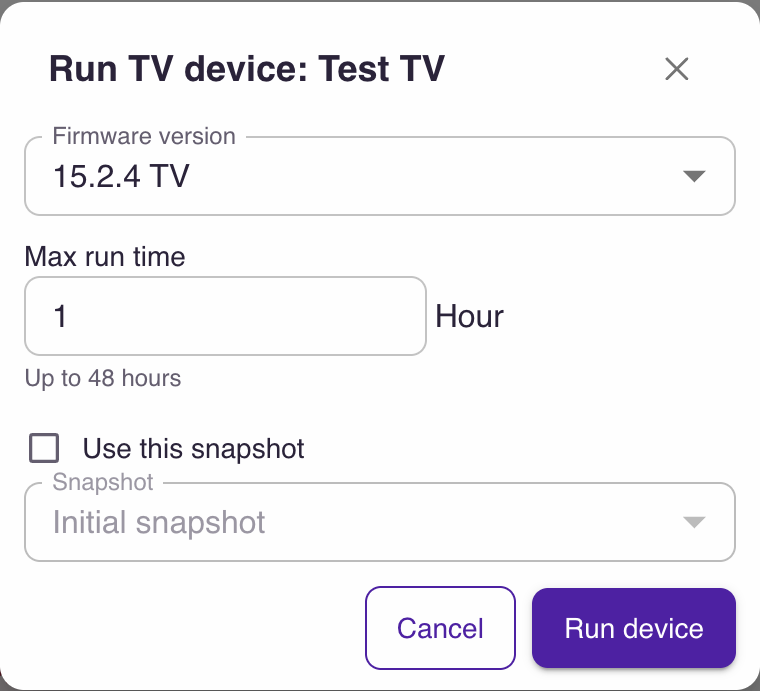
In the Devices list, click the Play icon next to the device you want to launch. The Run device dialog opens.
-
Configure the following settings:
- Firmware version: Select the Roku OS build to run on your virtual device. Only two build versions are available: the current publicly released Roku OS version, and the build for the next release currently under active development.
- Max run time: Set a maximum runtime to limit how long a virtual device stays running. This helps control cost, prevents abandoned sessions, and keeps automated runs within an expected time budget.
- Use this snapshot: If you have saved snapshots, select the one to run. By default, the last known device state is used.
- Enable the Use this snapshot checkbox.
- From the Snapshot drop-down, select the snapshot to use.
-
Click Run device.
-
Once the device status changes to Running, click View device (the TV icon) to launch the web interface.
Link only one account to a virtual device. Changing accounts on any snapshot affects the behavior of other snapshots.
To prevent the device from becoming unresponsive due to inactivity, disable auto power savings settings on the virtual device.
Viewing a virtual device
Once a device is running, the RCE web UI displays a device viewer and a virtual remote.
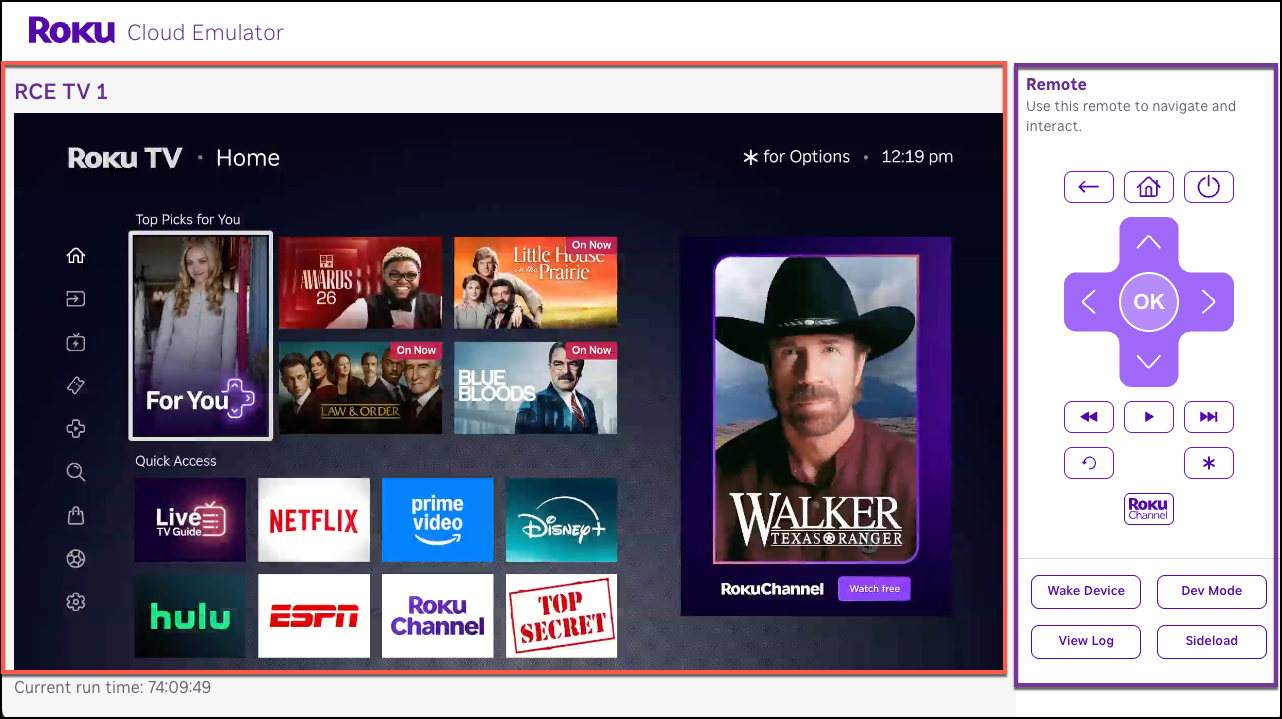 When you initially launch the device, it has factory settings and you need to activate it.
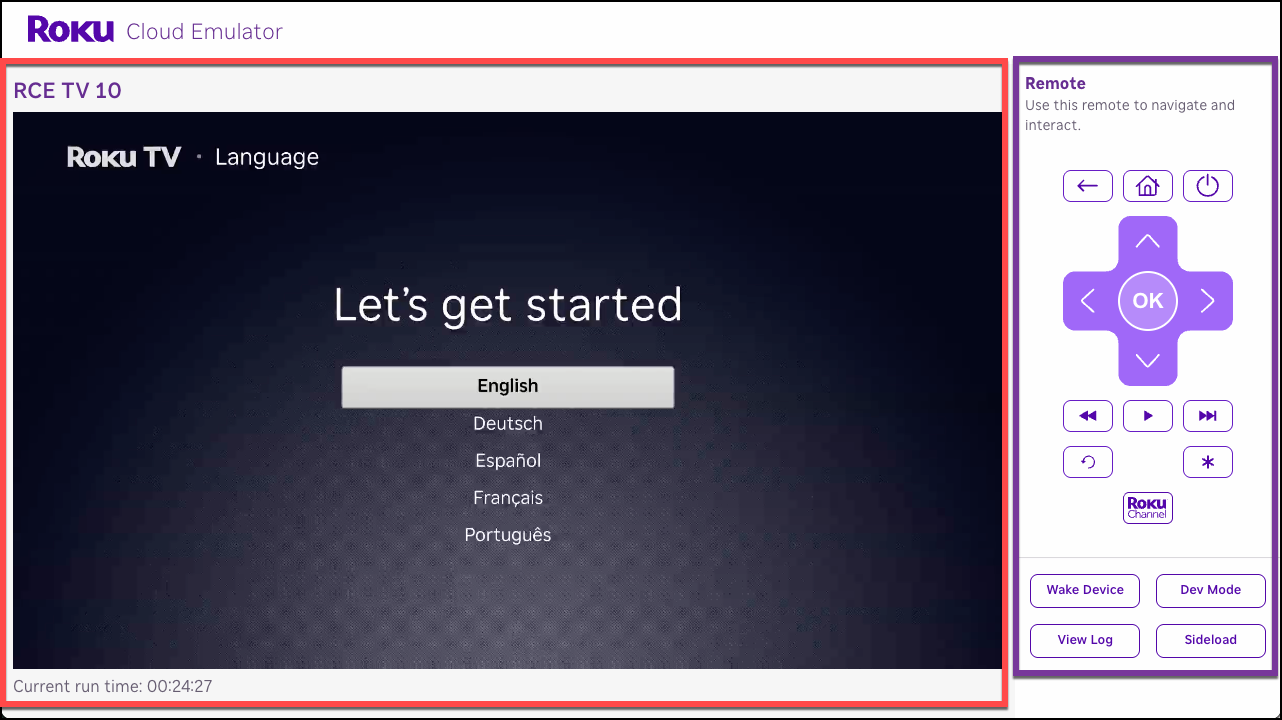
When you initially launch the device, you need to complete the activation flow. Once you are done, save a snapshot of your device to avoid repeating the flow.
Device Viewer
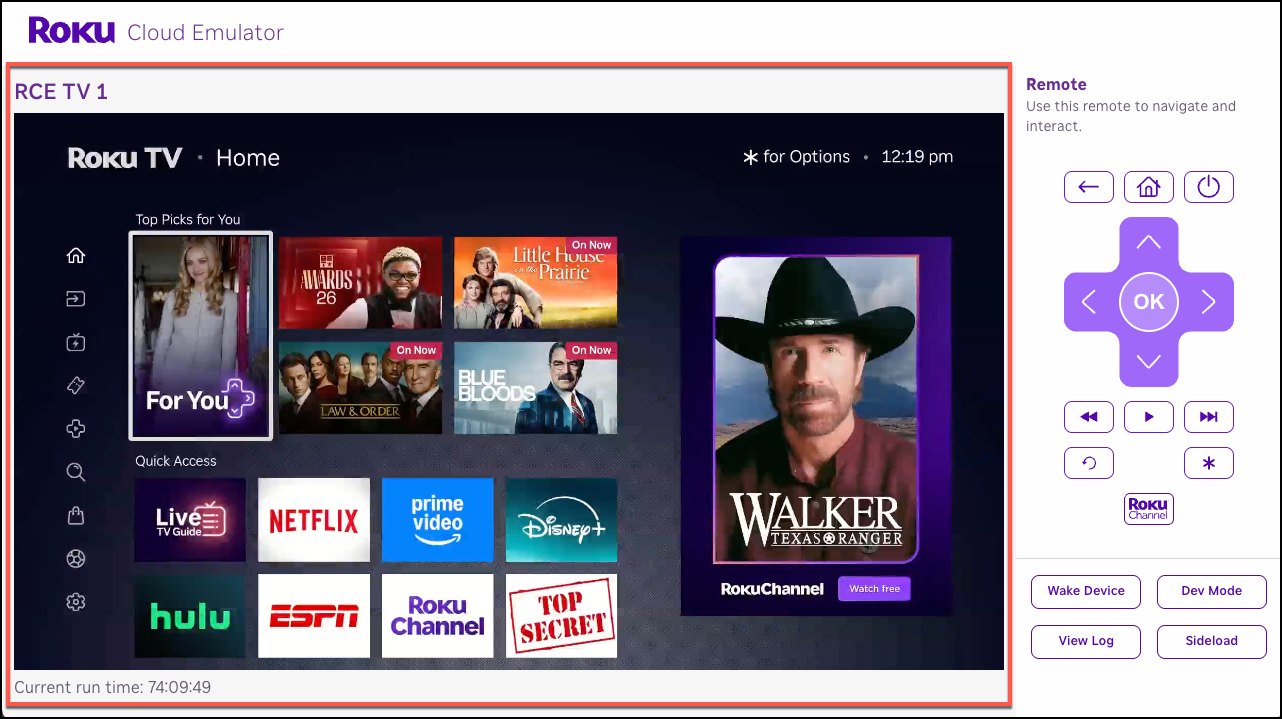
The Device Viewer streams a live view of the virtual device's display directly in the browser, providing real-time visual feedback as you navigate and test your app.
Virtual Remote
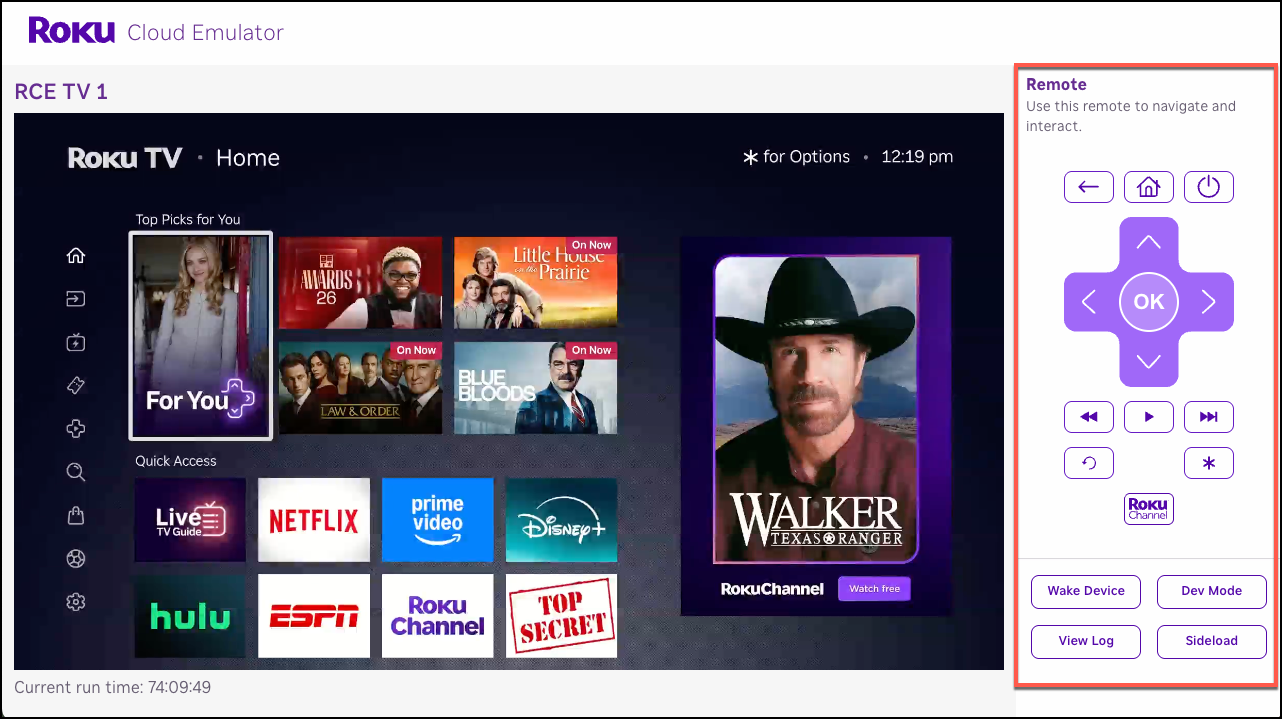
The Virtual Remote replicates the standard Roku remote control in the browser, sending commands to the virtual device. It supports full navigation input, including:
- Directional pad (D-pad) navigation
- Select, Back, and Home buttons
- Media playback controls (Play, Pause, Fast Forward, and Rewind)
- Replay and Options (*) buttons
- App shortcut buttons
You can use the following keyboard commands to navigate the device viewer:
- Up, Down, Right, and Left
- Home (Home remote button)
- Enter or Return (OK or Select remote button)
- Esc (Back remote button)
You can also use your keyboard to enter text in the device activation flow, sign-in and sign-up flows, Roku Search, other text entry fields in the Roku platform UI, and in your app.
Saving snapshots
You can take snapshots to save a virtual device's state at a specific time and then restore it to that state later. A snapshot contains the persistent storage partition that stores apps, device settings, and other device metadata across reboots. Snapshots enable you to configure, save, and use multiple states to run different test cases on a single virtual device. They also eliminate redundant manual steps that would otherwise be needed to reconfigure your device back to a state for running specific test cases.
An initial snapshot is automatically created when you add a new device. The initial snapshot is similar to a factory reset, but preserves credentials for your various apps.
Link only one account to a virtual device. Changing accounts on any snapshot affects the behavior of other snapshots.
To take a snapshot, follow these steps:
-
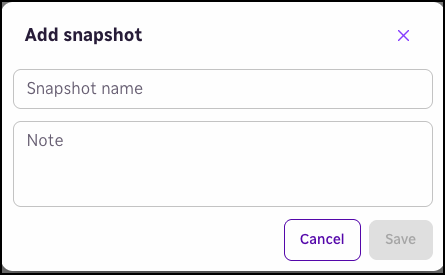
Click the Snapshot icon in the device row. The Add snapshot dialog opens.
-
Enter a unique, descriptive name for the snapshot that makes it easy to identify the device state.
-
Optionally, enter any notes for the snapshot.
-
Click Save.
-
You can manage snapshots from the Device Details page.
Managing devices
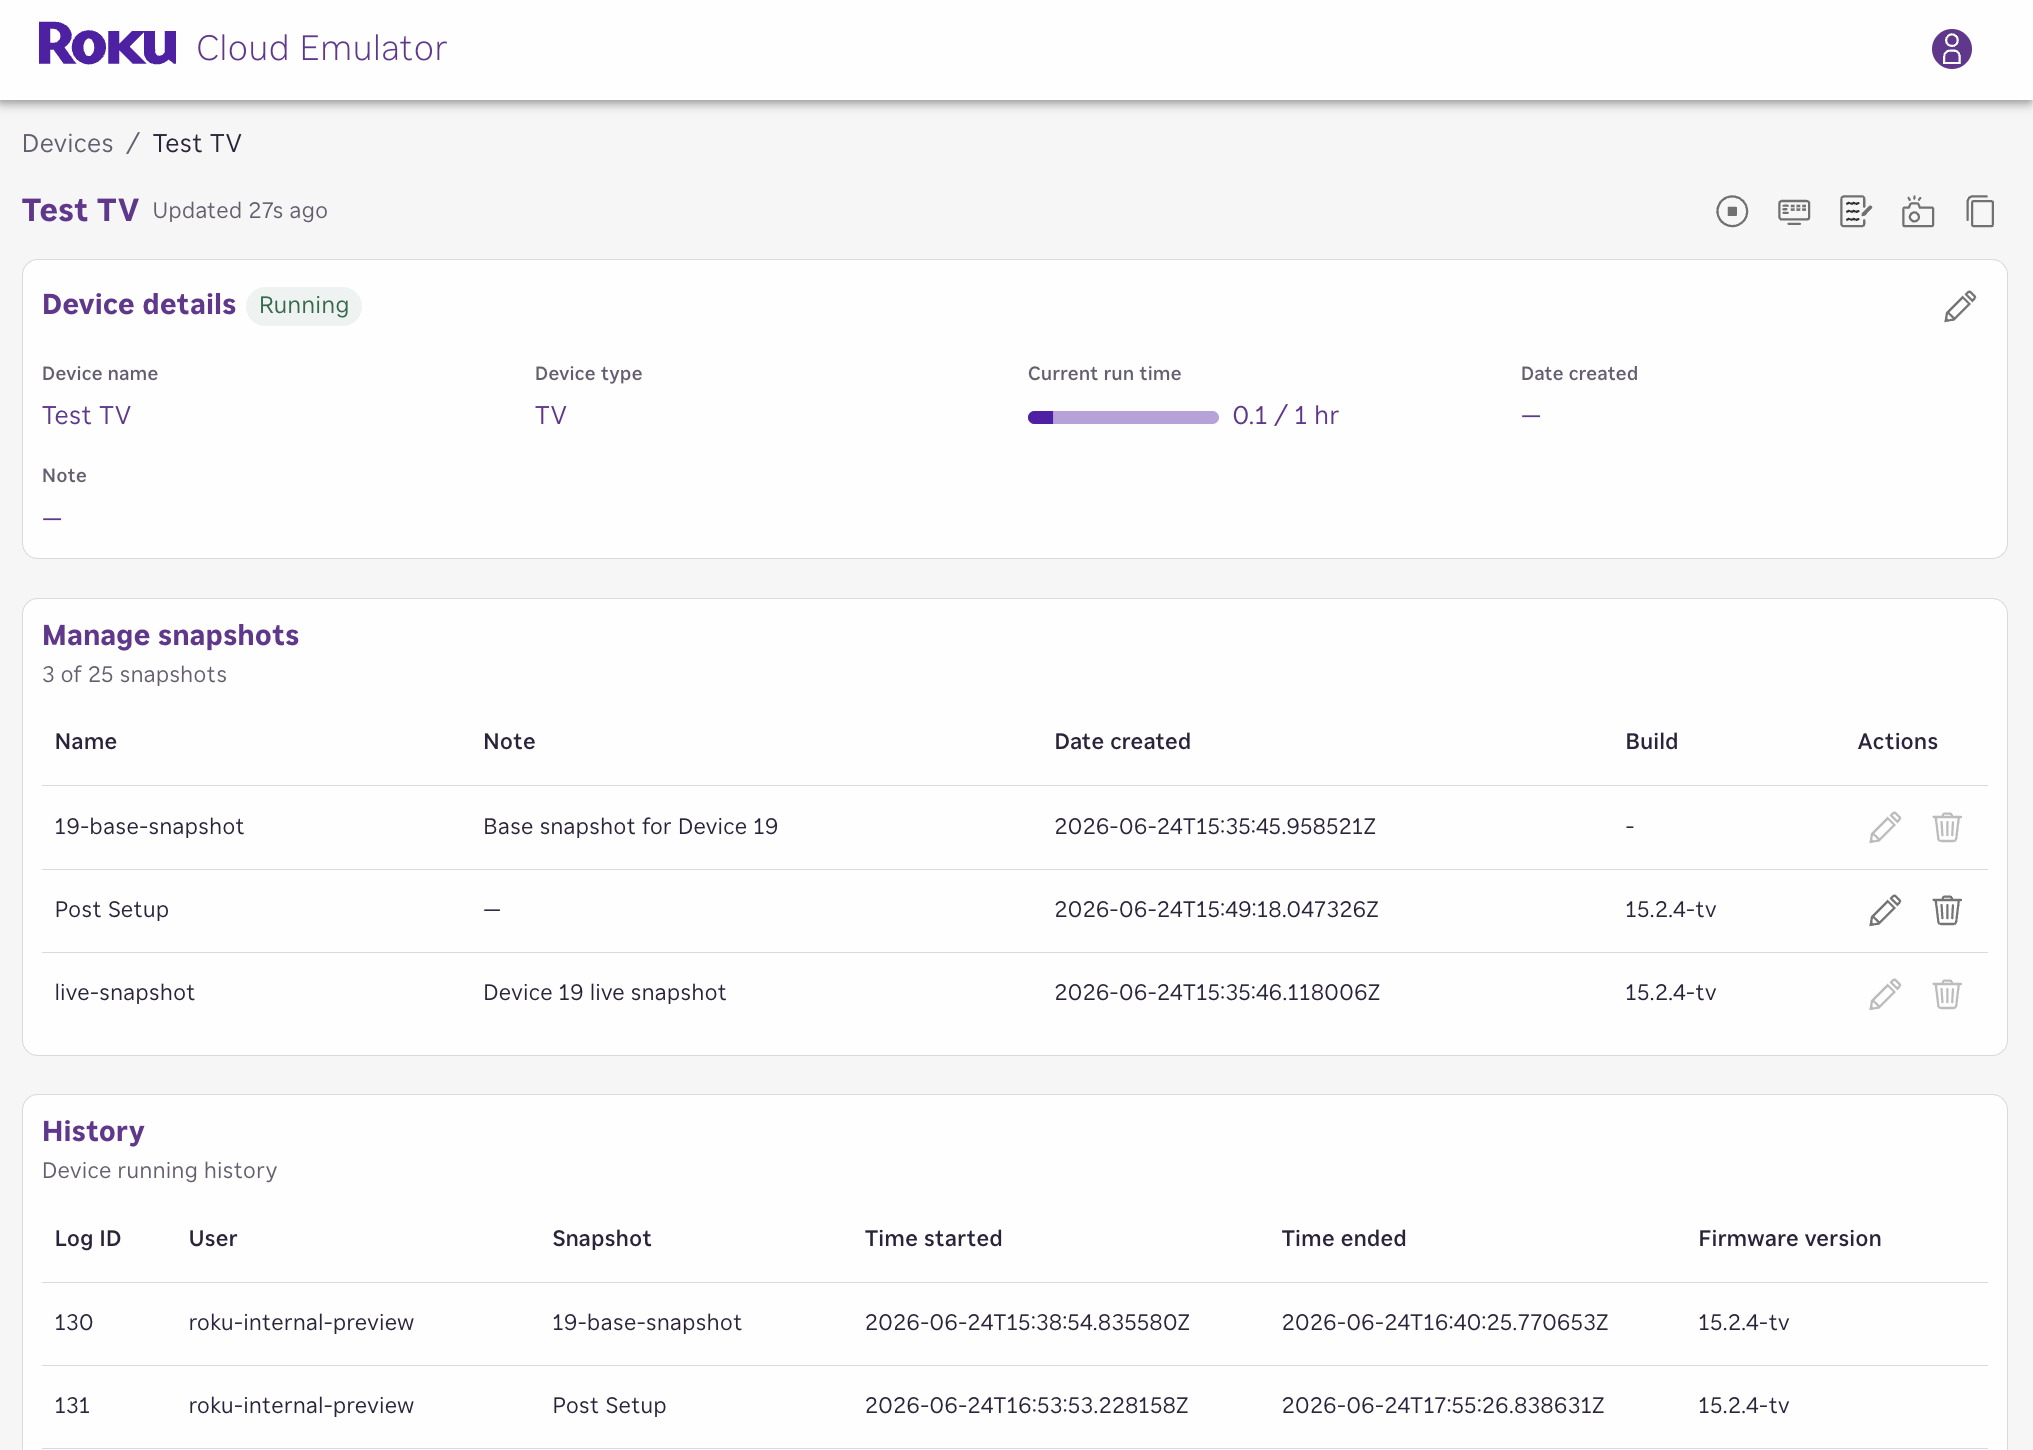
Click a device to open the Device details page. This page lets you view device information, manage snapshots, and view device history.
Device details
You can view the following information for each device:
| Field | Description |
|---|---|
| Device name | The user-specified name of the virtual device. |
| Device type | Indicates whether the device is a Roku streaming player (STB) or a TV. |
| Current run time | The amount of time the virtual device has been running. |
| Date created | The date the device was created. |
| Note | Any user-specified notes about the device. |
Manage snapshots
You can view the following information for each device snapshot:
| Field | Description |
|---|---|
| Name | The user-entered name of the snapshot. |
| Note | Any user-specified notes about the snapshot. |
| Date created | The date the snapshot was created. |
| Build | The Roku OS version and build number used in the device snapshot. |
| Actions | You can edit the name and notes of the snapshot, or delete the snapshot. You cannot delete the initial snapshot. |
History
You can view the activity log for the device, which includes the following information for each device run:
| Field | Description |
|---|---|
| Log ID | The unique ID generated for the run. |
| User | The email address of the user running the device. |
| Snapshot | The snapshot used for the device run. |
| Time started | The time the device run started. |
| Time ended | The time the device run ended. |
| Firmware version | The Roku OS version and build number used for the device run. |
Sideloading apps
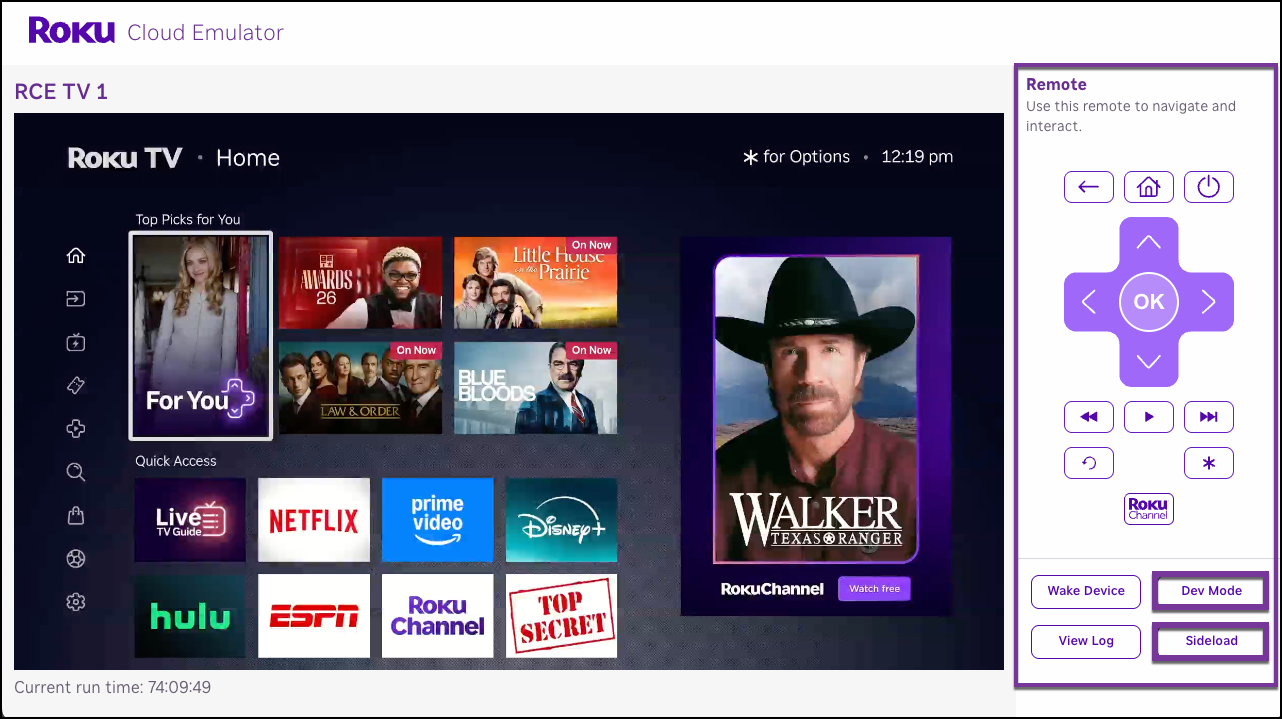
To sideload your apps on virtual Roku devices, follow these steps from the Device Viewer:
-
Click Dev Mode in the viewer UI to activate developer mode on your virtual device. You cannot use the standard remote button sequence to do this.
-
Click Sideload to open the Development Application Installer, and then select and upload your app.
Debugging apps
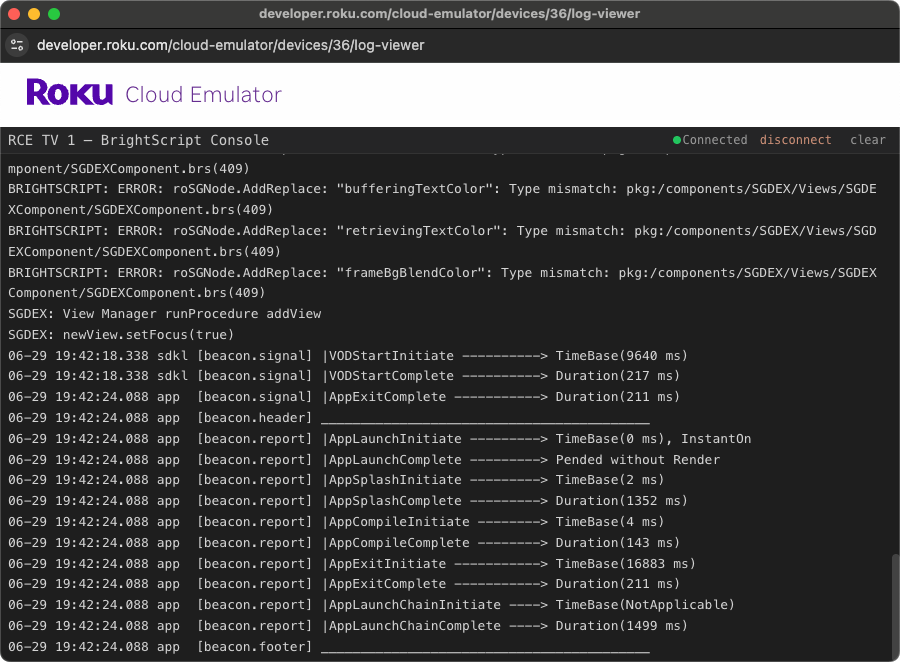
While a sideloaded app is running, you can access a read-only version of the BrightScript debug console (port 8085) to view crash logs, stack traces, and app output.
To launch the debug console, follow these steps:
-
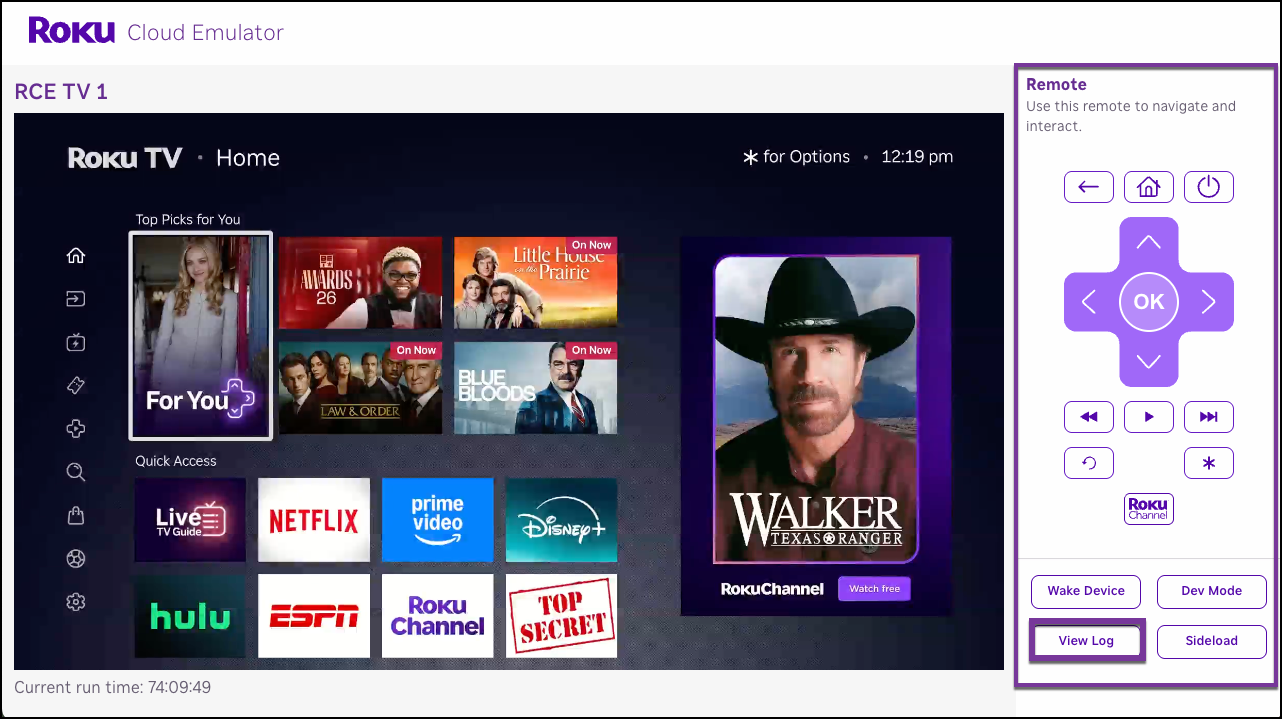
Click the Log viewer icon on the RCE index page, or click View Log in the Device Viewer.
-
The BrightScript debug console opens in a new window. The debug console is read-only.
Limitations
The RCE does not support the following features and scenarios:
- Live tuner and antenna: Over-the-air tuner input is not emulated.
- HDMI and analog audio/video in and out: Hardware A/V I/O is not supported.
- Physical, mobile app, and third-party remotes: Only the built-in web virtual remote is supported.
- Suspend and resume: App lifecycle suspend and resume states are not emulated.
- Wi-Fi: Network interface emulation does not include Wi-Fi behavior.
- Voice commands: Voice search and hands-free features are not supported.
Device type support
The RCE currently supports TV and streaming player device types only.
Country support
The RCE currently supports US-based devices only. The location of the Streaming Store still depends on the developer's account profile setup. Ensure your app is accessible from US-based devices before you begin testing.
To set up a device outside the US, use a VPN with a US exit node.
DRM support
The RCE can play unprotected content and content with the following DRM protection:
| DRM | Level | Resolution |
|---|---|---|
| Widevine | L3 | HD content (1080p or 720p) |
Troubleshooting
You can resolve common virtual device issues by following these troubleshooting steps for audio problems and screen responsiveness:
| Issue | Description | Cause | Solution |
|---|---|---|---|
| No audio from virtual device | You can see video but cannot hear audio. | Browsers may automatically mute audio on page load. | Unmute the audio in your browser. The method varies by browser, so consult your browser's documentation for specific instructions. |
| Screen blackout with no response | The screen blacks out and stops responding if there is no interaction with it over time. | Inactivity timeout or power-saving mode activation. |
|
| Sideload button returns a 403 AccessDenied error | When you click Sideload, the UI opens a page with a 403 AccessDenied error. | The virtual device is not in developer mode. | In the Device Viewer, click Dev Mode to activate developer mode. |
Appendix A: Adding users to the Roku Cloud Emulator
Once your developer account has been granted access to the RCE, you can invite additional RCE users to your account by following these steps:
-
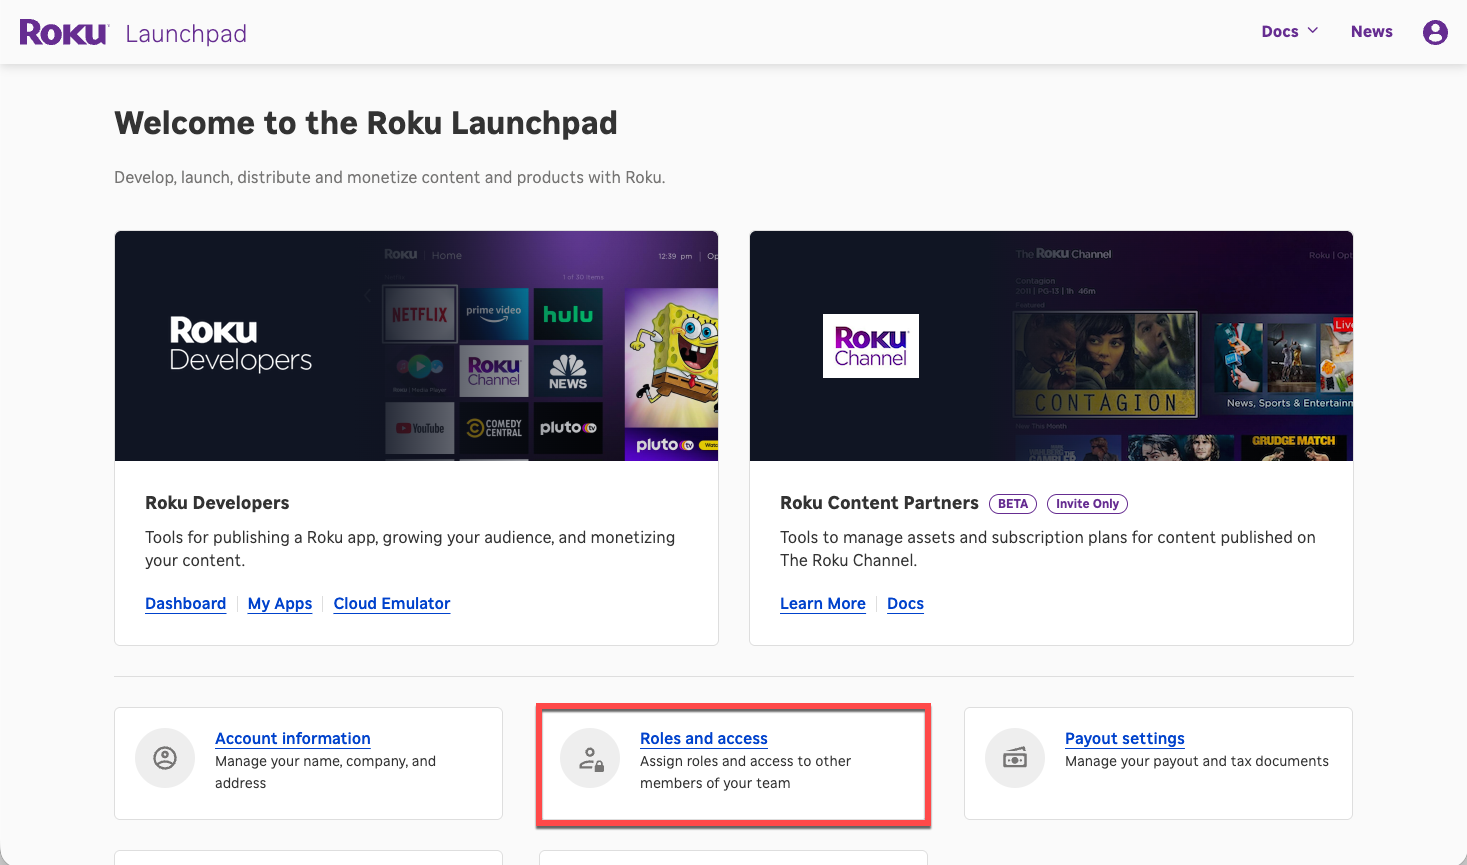
Go to the Roku Developers Launchpad and click Roles and access.
-
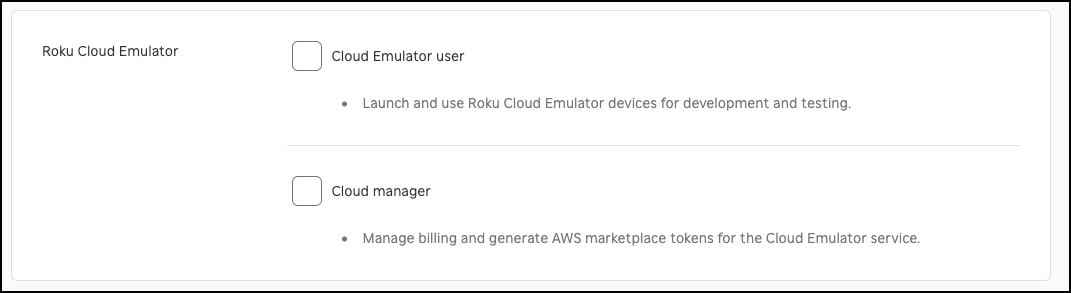
Click Invite a new user, scroll to the Roku Cloud Emulator permissions, and then select either the Cloud Emulator user or Cloud manager role for the user.
-
Once a user is invited, they can accept the invitation sent to their email. After accepting, the Cloud Emulator link is available to them on the launchpad.
To grant RCE access to existing users in your account, click the user and add the applicable RCE role for them.
Appendix B: Purchasing a Roku Cloud Emulator subscription
Using the 5-hour free trial
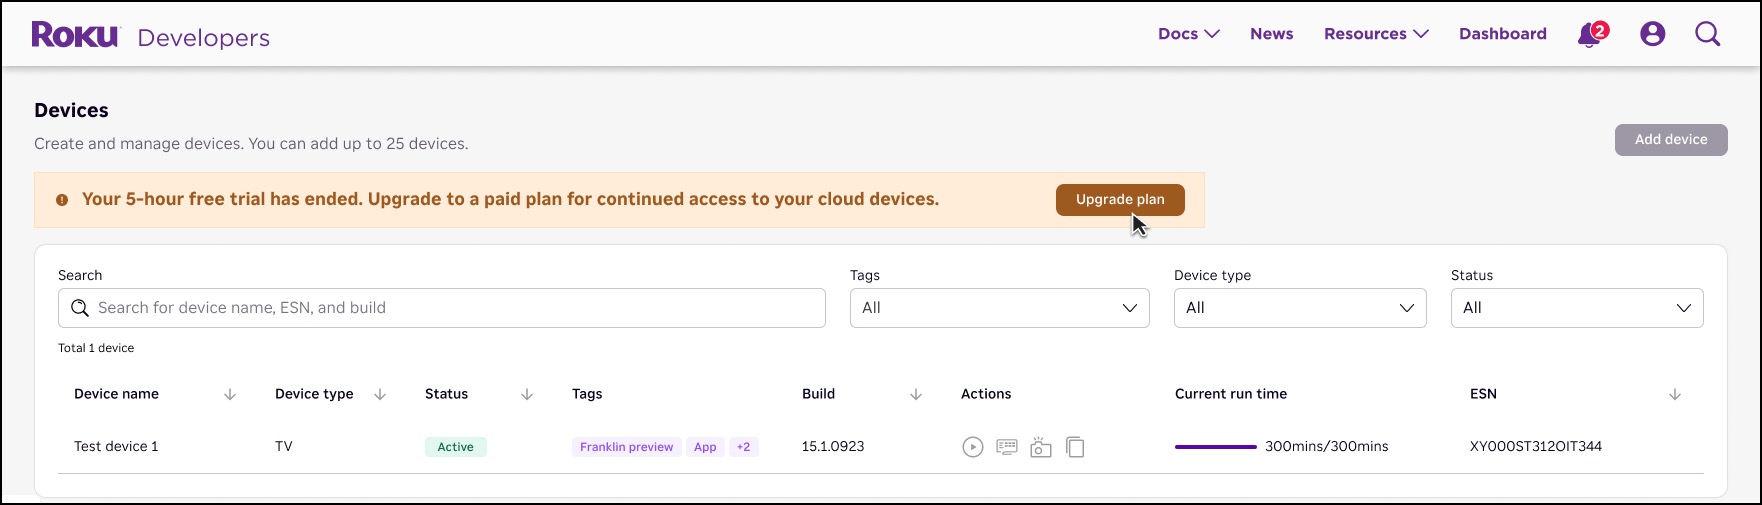
The RCE includes a 5-hour free trial for individual Roku developer accounts. During the trial, you have full access to the tool, including the ability to create and manage a single device, run that device (limited to a single stream), and sideload and test apps.
Once the 5-hour free trial elapses, you can only access the Devices page to view and manage device instances. The action buttons to view and run devices, take snapshots, and copy instance URLs are no longer available.
Subscribing to the Roku Cloud Emulator
See the RCE AWS Marketplace listing for pricing, terms of service (TOS), and the end user license agreement (EULA). The RCE subscription is only available to users in the USA.
To continue accessing your RCE devices and create additional instances, the root account owner or a user with the Admin or Cloud Manager role can purchase an RCE subscription from the AWS Marketplace by following these steps:
-
Click Upgrade Plan on the Devices page.
-
Read the instructions on the Upgrade page for how to provide the displayed instructions to your AWS administrator, if you have one.
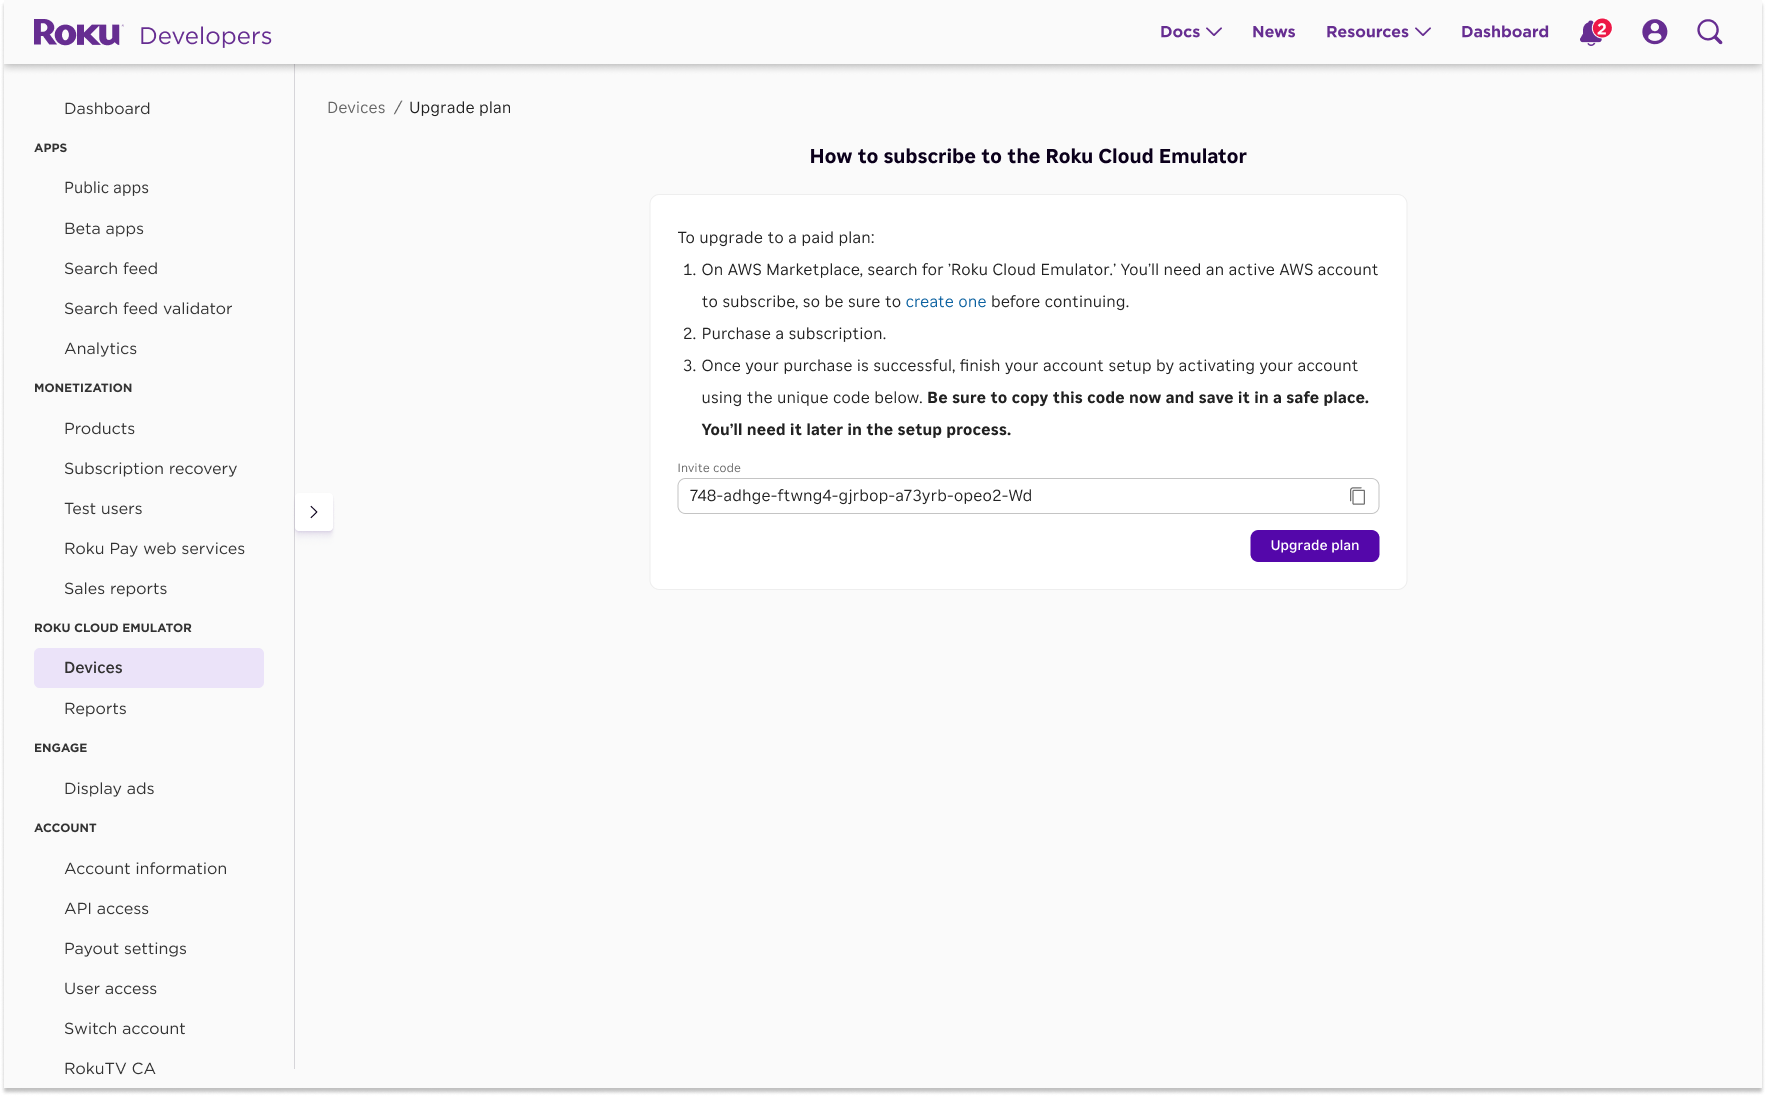
-
If you have an AWS administrator, pass the upgrade instructions and the invite code to them by following these steps:
- Copy and store the Invite code on the page. The code is needed to activate your subscription.
- Your AWS administrator completes steps 4 through 8.
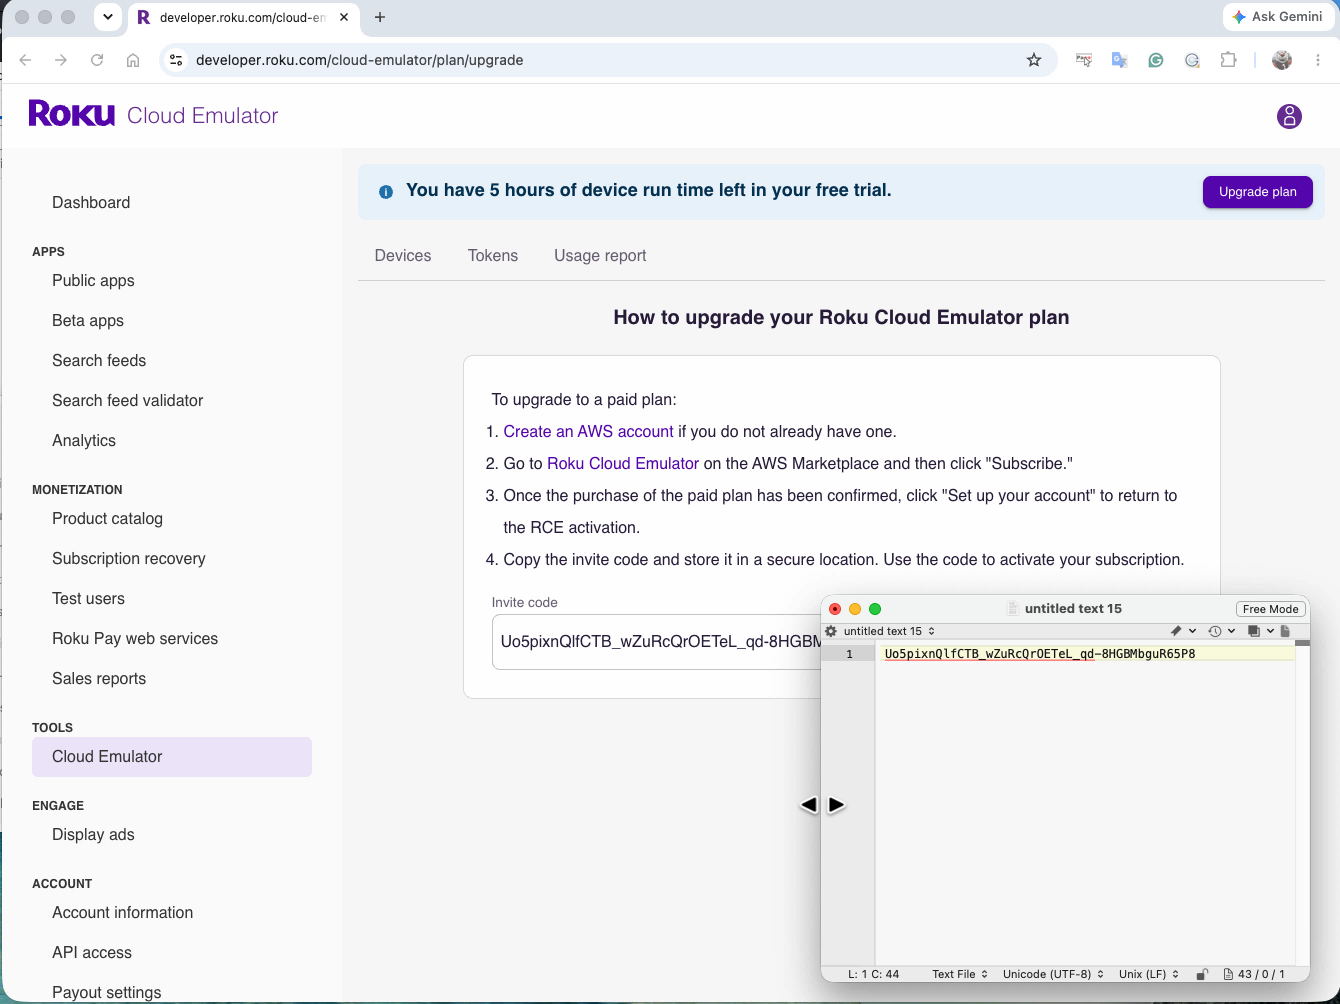
-
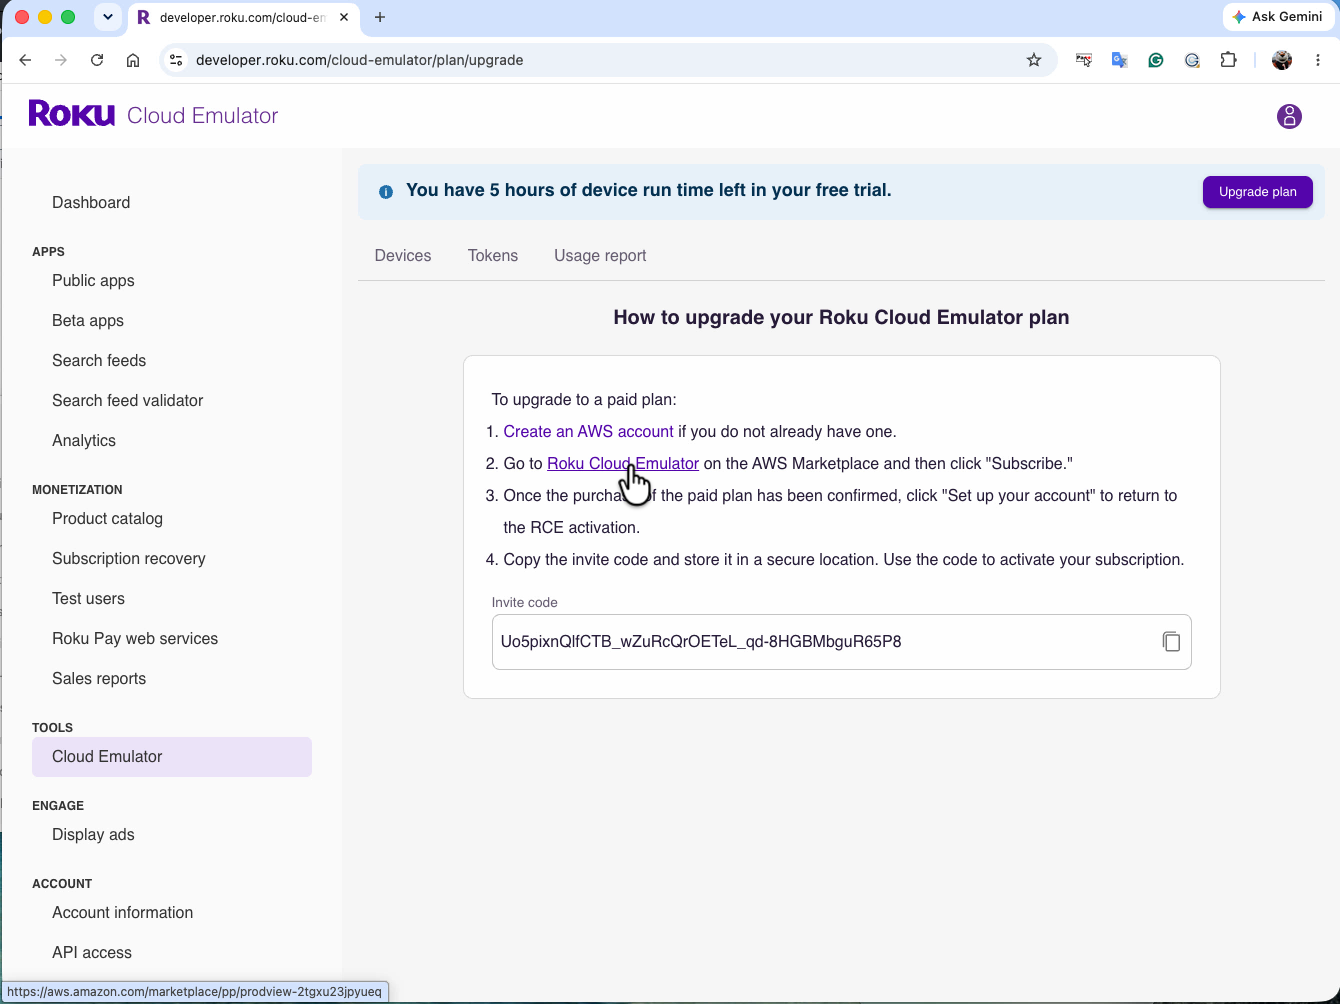
Click the Roku Cloud Emulator link included on the page in step 2.
-
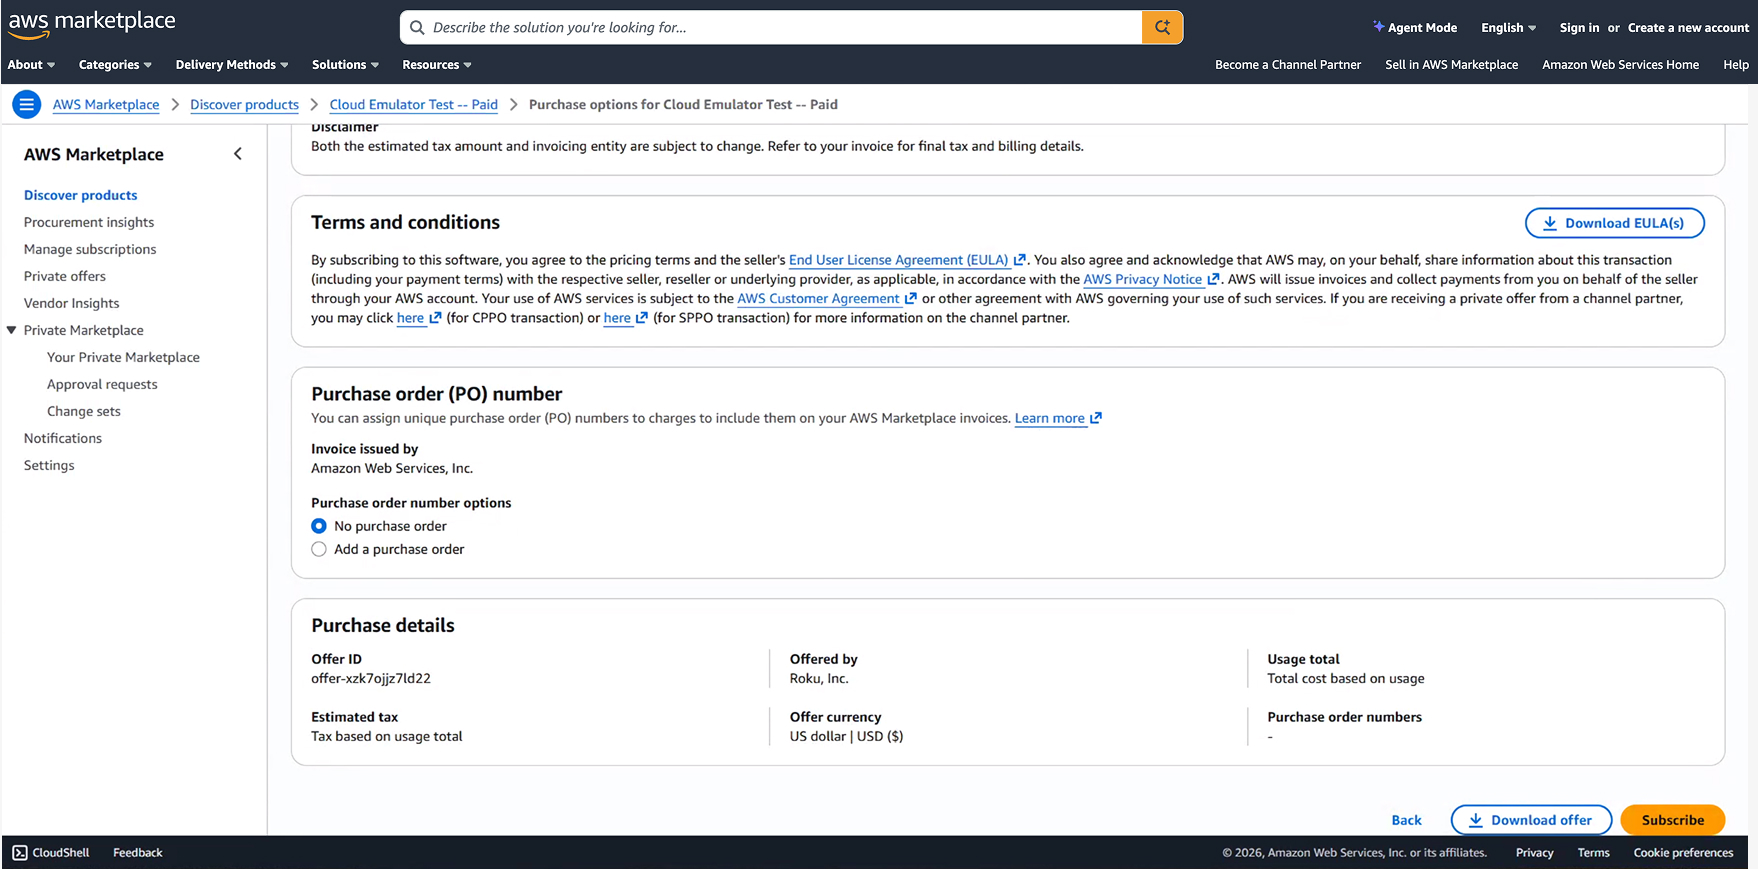
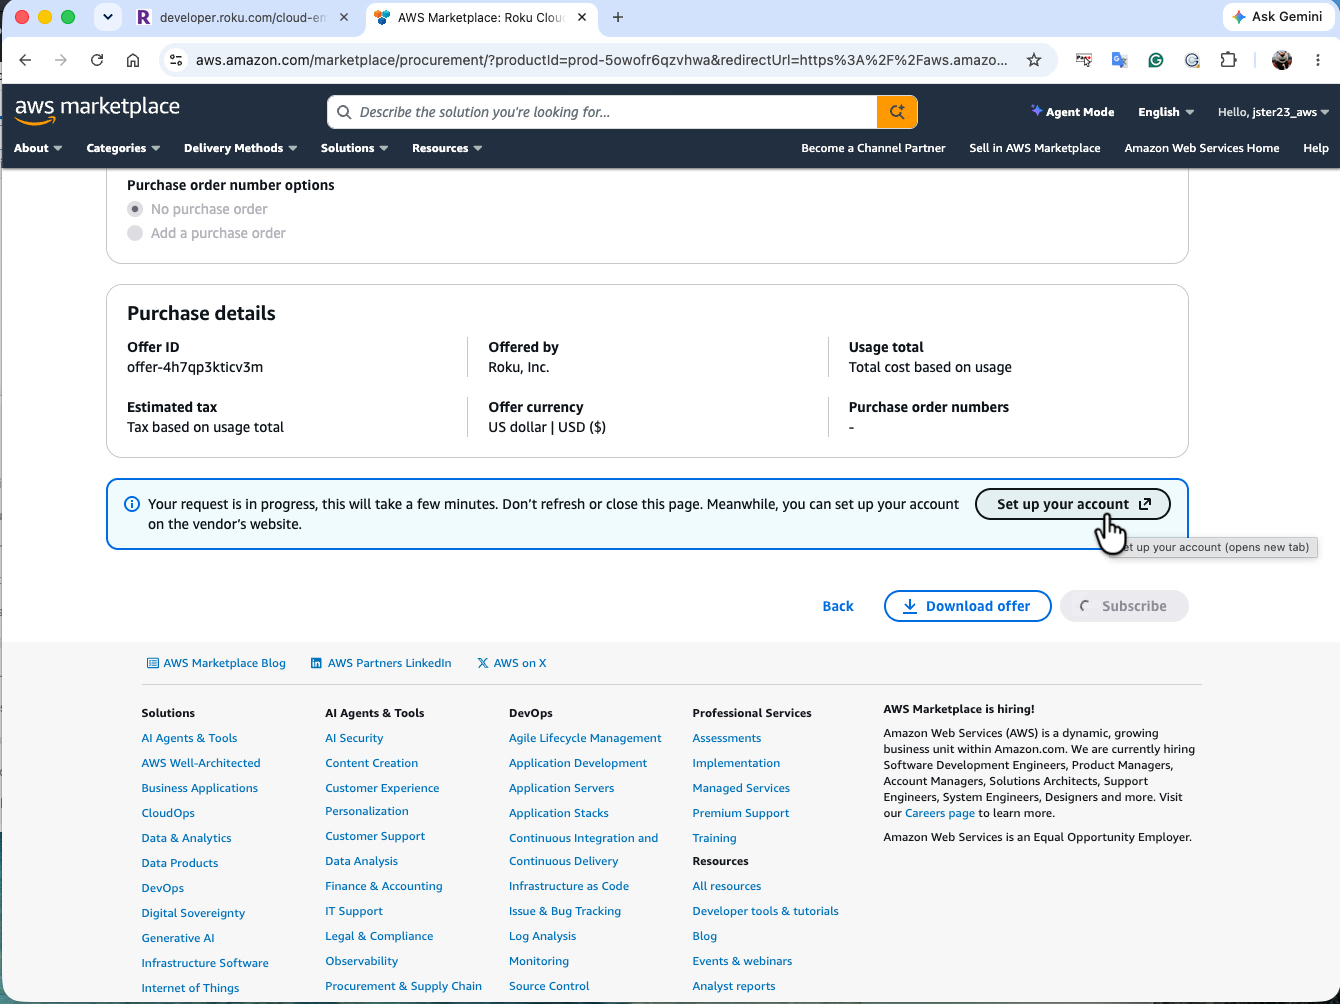
In the AWS Marketplace, click View purchase options, scroll down, and then click Subscribe.
-
Once the purchase of the paid plan has been confirmed, click Set up your account to complete the RCE activation workflow.
-
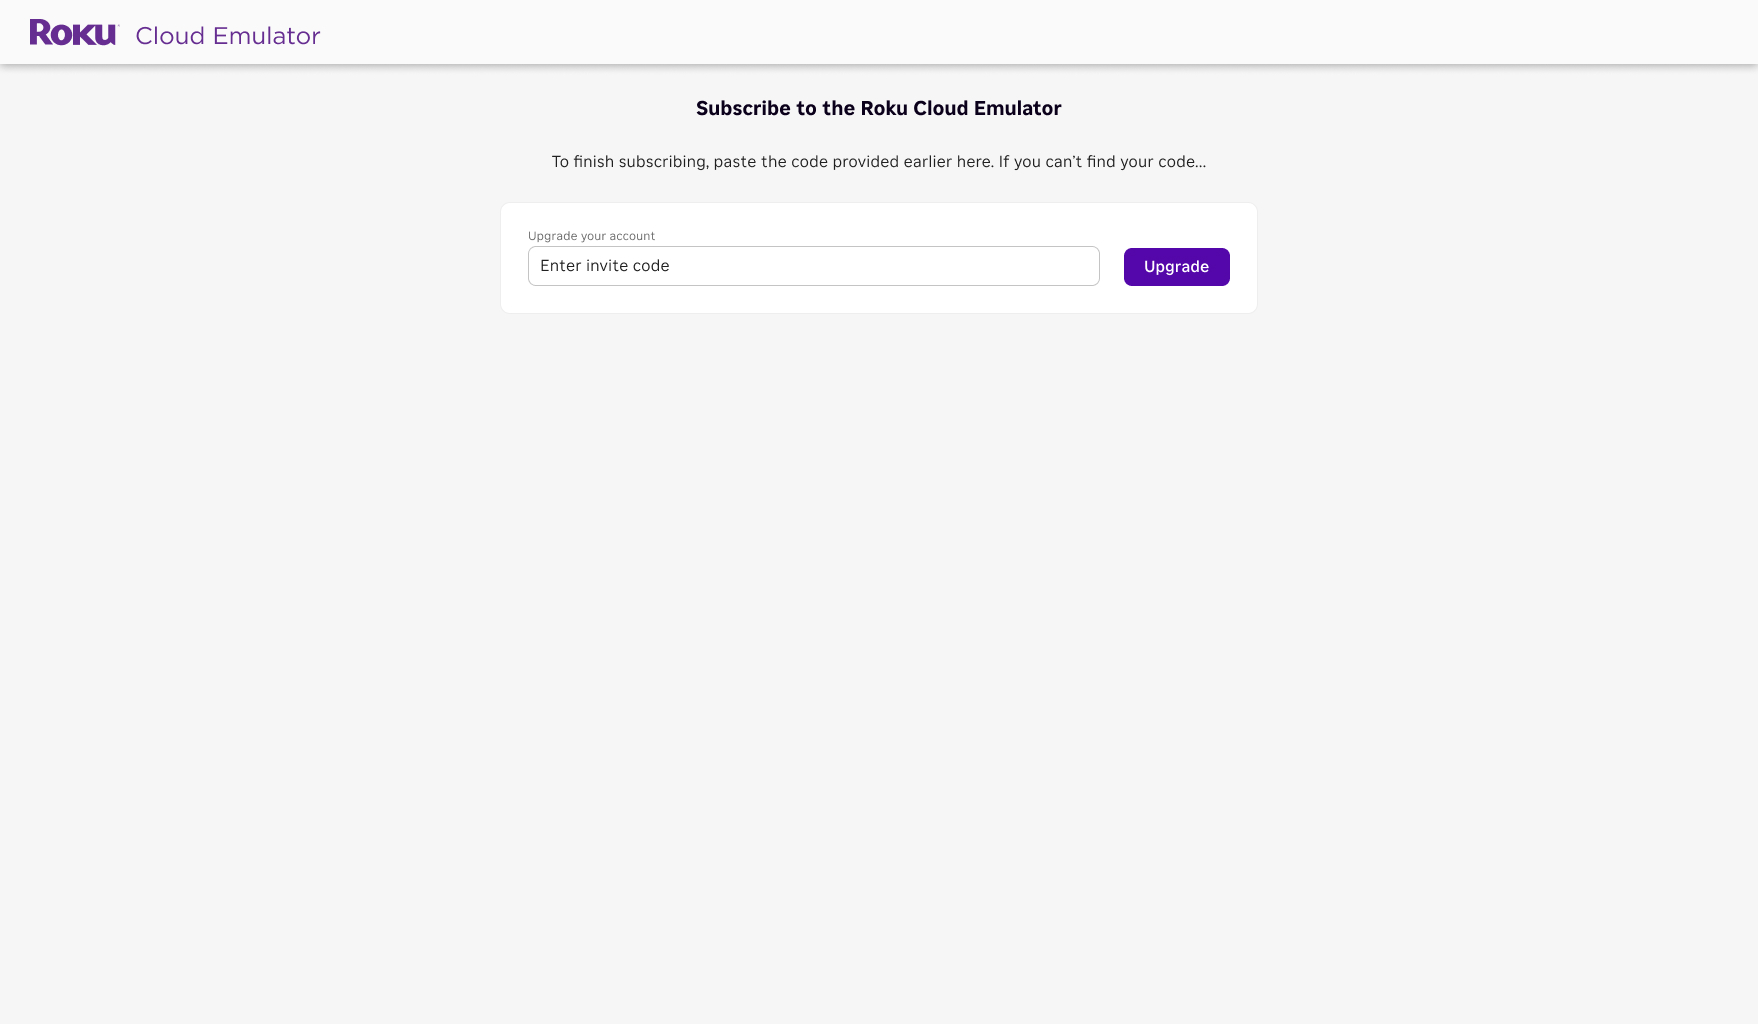
Enter or paste the invite code that you saved, or received from your Roku developer, and then click Activate.
-
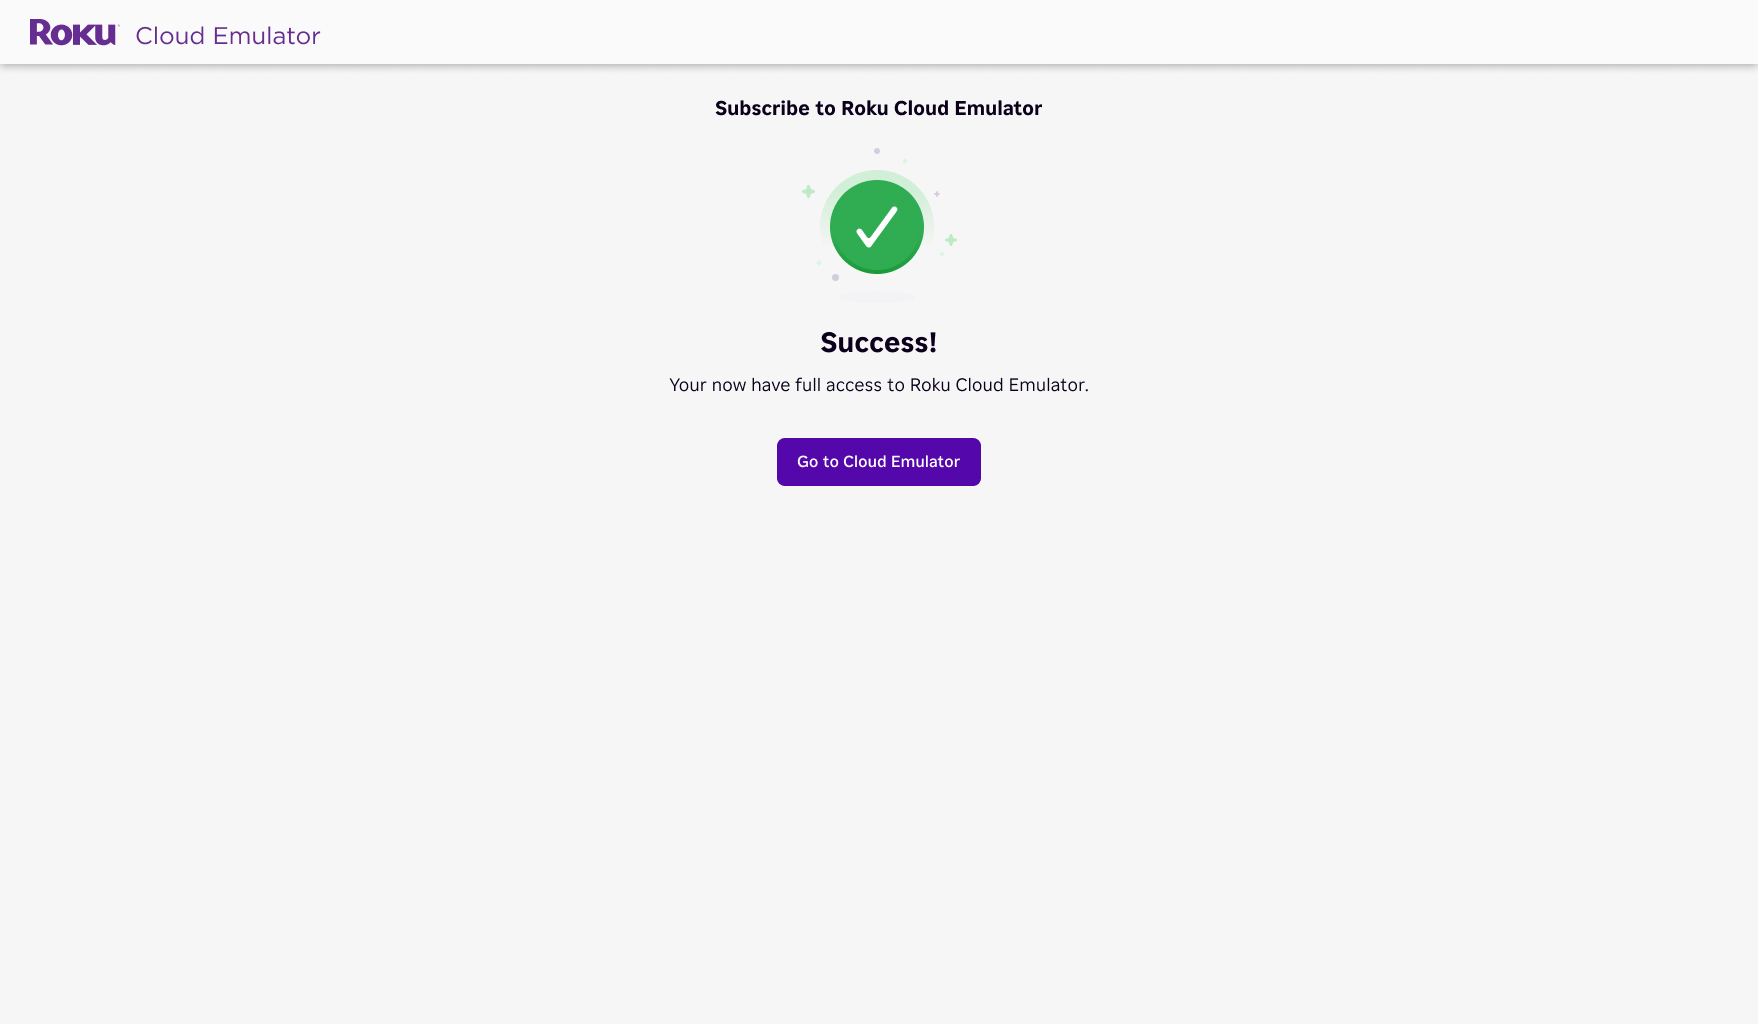
The redemption confirmation screen is displayed. You can return to the RCE web page and continue creating and running RCE devices.
Video tutorial
The following video demonstrates how to purchase an RCE subscription from the AWS Marketplace:
Appendix C: API access
The RCE provides a REST API for managing virtual devices programmatically. You can use the API to start devices, sideload apps, send ECP commands, access the BrightScript debug console, and more, enabling integration into CI/CD pipelines and automated testing workflows.
To authenticate with the API, generate a Personal Access Token (PAT) from the Cloud Emulator tokens page. Include this token in your API requests in the X-Authorization header.
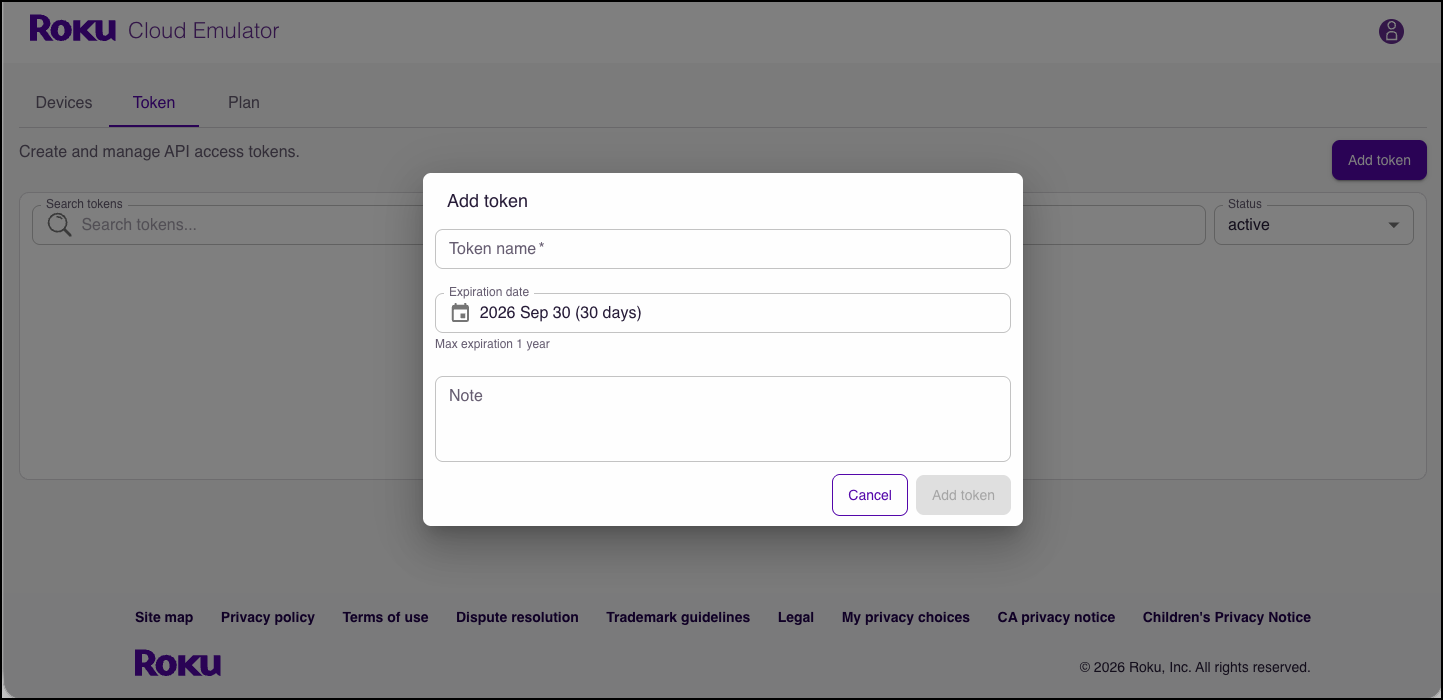
For the full API reference, see the Roku Cloud Emulator API Guide. The interactive Swagger doc also provides a list of available endpoints and can be used to test API calls directly.
Updated 1 day ago